
I wanted to be able to dry anything from small sausages to full hams, but had to keep it under 2 feet deep. I wanted to use dowels to hang the meats from, either strung up, or directly on them (i.e. polish sausages). I also wanted to keep it neat and not leave my kind friends' closet a mess or attract unwanted guests with floor drippings. So I designed this to hold a commercial sheet tray on the bottom. It's easily removed and cleaned. Once I got to my friends' place and showed them the plans, we checked it against the space. To increase the ease of passage to the things in the back of this space, I reduced this by 3 inches in depth. It will still easily hold the sheet tray, it just doesn't nestle down perfectly into the base, no biggie.

In order to attach the dowel rods, I had several options. I could have cut a notch in the top of each 2X4 and simply set each dowel into the notch. I could have purchased a metal "strap" the size of the dowel and attached it with screws. But I decided on a method that allows multiple formats and offers ease of removal so the hanging of the meats is that much easier.
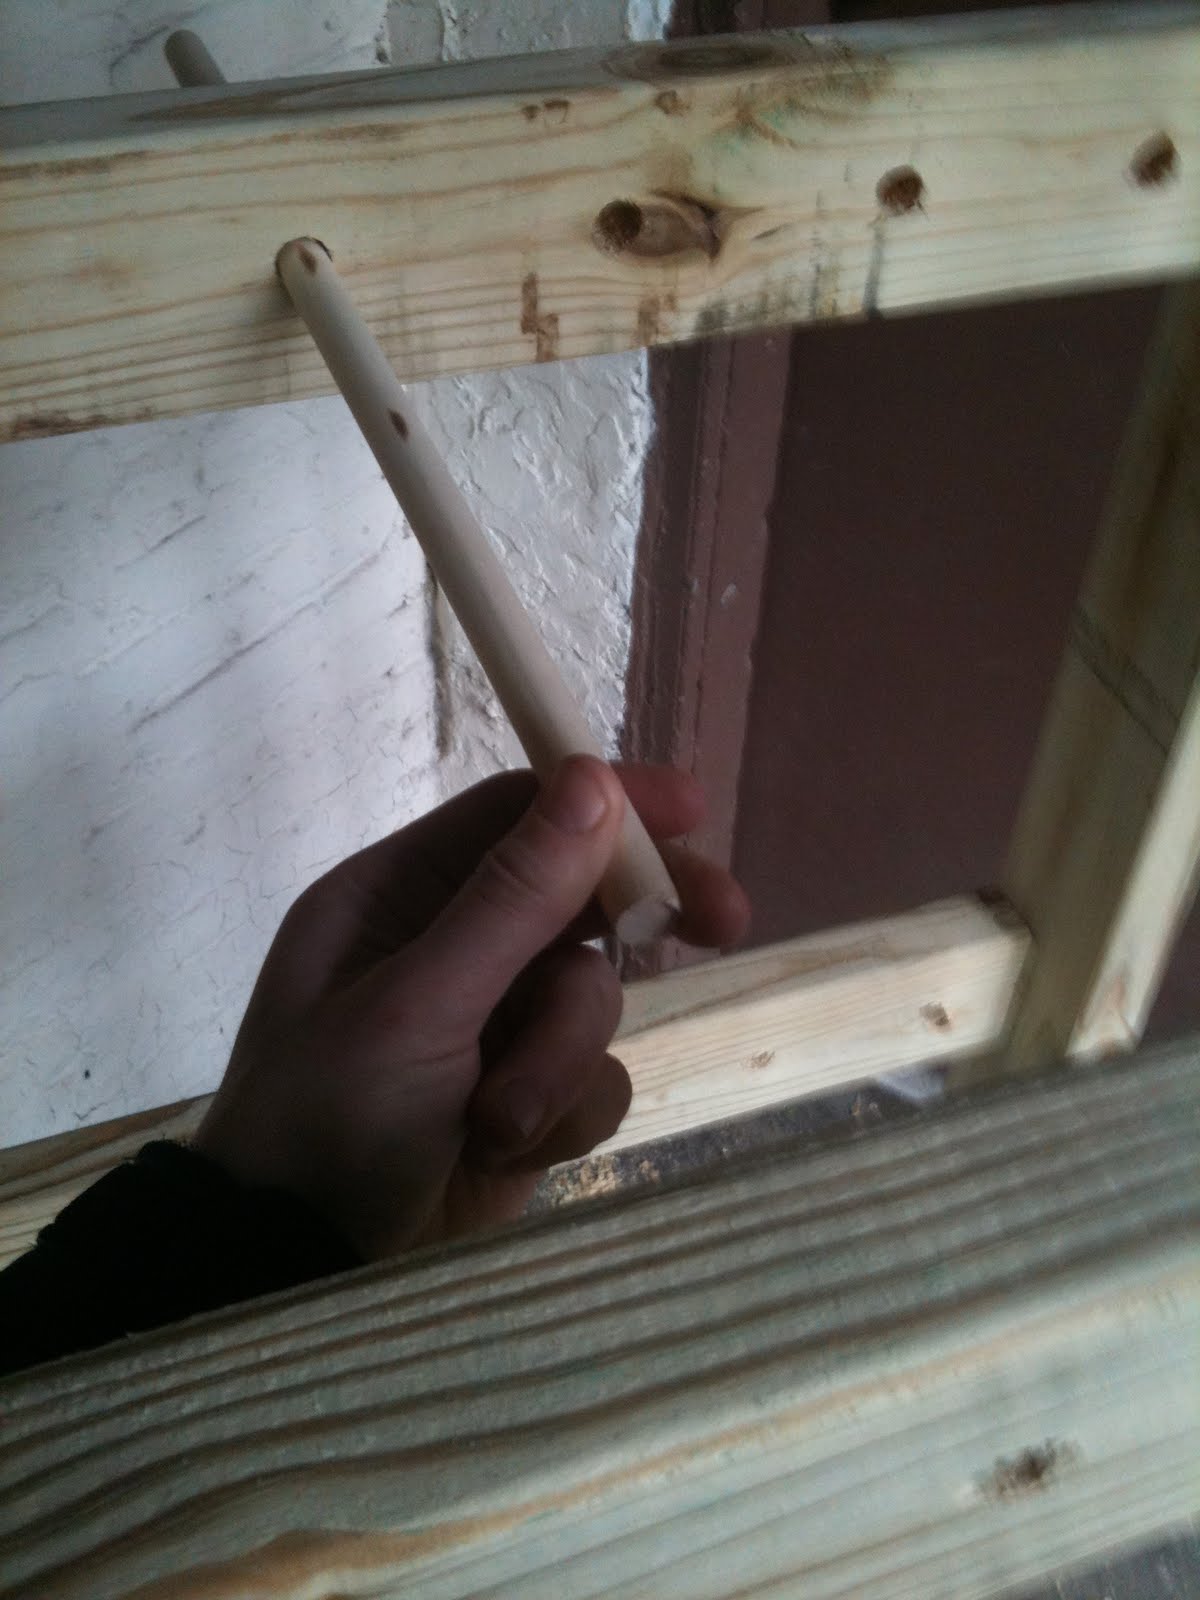
With this set-up, you can slide the dowel rod (5/8") into a hole (3/4") drilled into the back bar. You slide it in past the flush point and swing the front end of the dowel up to the whole drilled directly across from the back hole and slide the dowel forward into the whole, flush.

By using this technique, I can hang everything on the dowel and easily install it onto the rack. There is no standing in the drying room hanging each item. The narrowness bares little impact on the installation of the goods. And in general, it is much neater in appearance. All of which are very good aspects of this design. I am coating the dowel rods in a chopping block mineral oil. This keeps it safe for the meats to come in full contact with the rods.
Once the rack is loaded up, I'll be sure to post another picture!
nice. looks like it will work well. maybe you should go into the custom drying rack business... there's got to be buyers out there
ReplyDeleteGenerally I don't learn post on blogs, but I would like to say that this write-up very compelled me to take a look at and do it! Dairy cow housing is a concept of self-cleaning floors for dairy and the very latest in animal husbandry that significantly improve profitability and animal health.
ReplyDeleteWonderful article, thanks for putting this together! This is obviously one great post. Thanks for the valuable information and insights you have so provided here.
ReplyDeletebest drying rack for clothes